
Recently I came across the problem of how to authenticate at 3rd party systems from our productive infrastructure running in Pergola. Our client wanted to exchange files with an external data aggregator. Not that difficult, but the information was sensitive and they didn’t want grandma and the rest of the internet to listen in.An easy solution was found: Use the good old reliable SCP ( Secure CoPy, or in other words: throw files through an encrypted SSH connection ).
So far so good, but how do we protect the secret information in the productive environment of the Pergola platform runtime? Especially, if it is not just a password but a private key file?
Before we start: Protect your key
A word of warning: Never push your private key ( or passwords ) to git!
The private key is the secret ingredient of the whole encryption scheme that makes sure, that only you ( the owner of the private key ) can decrypt it. Without the private key, all the data is just useless noise.
Of course we never handle such sensitive pieces as resources together with our source code. It is considered part of the configuration of your app.
Get the private key into Pergola
There’s just 2 steps you need:
- Add the private key to your config in Pergola UI (CLI works as well, of course)
- Reference it in pergola.yaml
The order of the steps is not important, you can do it vice versa if you like.
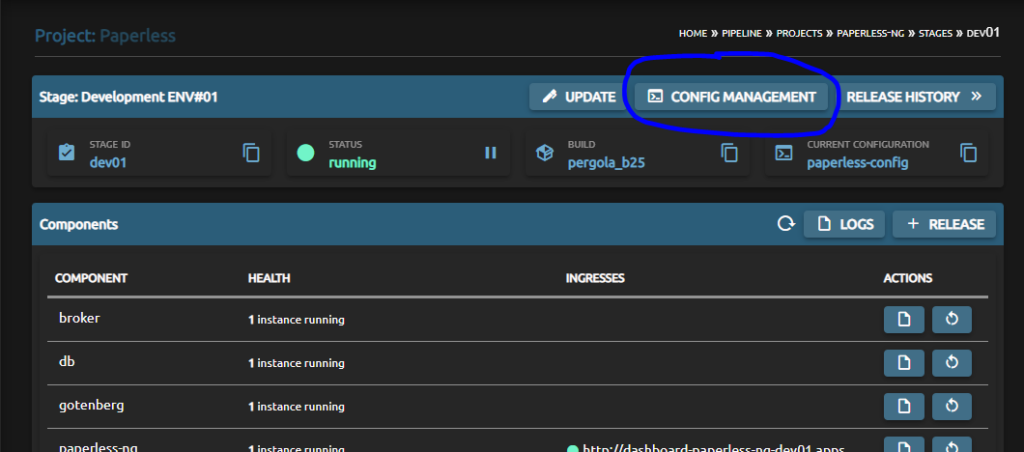
Step: Add file via UI
In Pergola, configs are always ‘per stage’ to ensure not mixing up valuable ‘real production data and resources’ with ‘I just want to test around’. Thus, you need to navigate to Config Management of a stage:
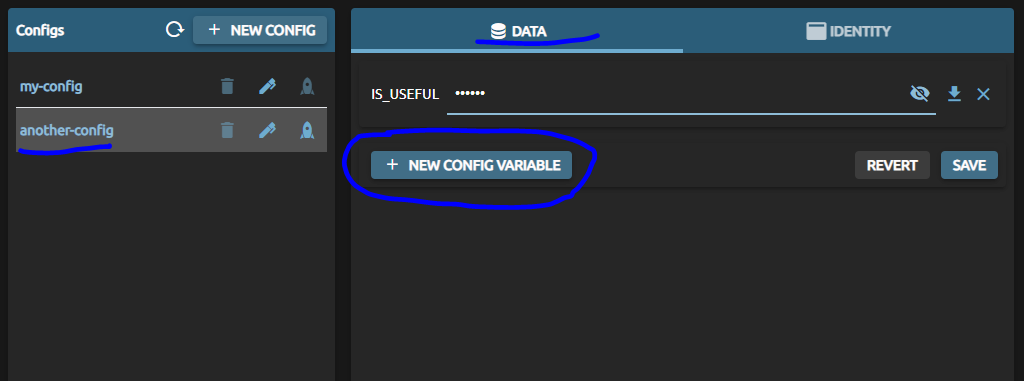
Next up, make sure you choose the config you want to add the private key to or create a new one. On the right-hand side, in the ‘data’-tab, create a new config item.
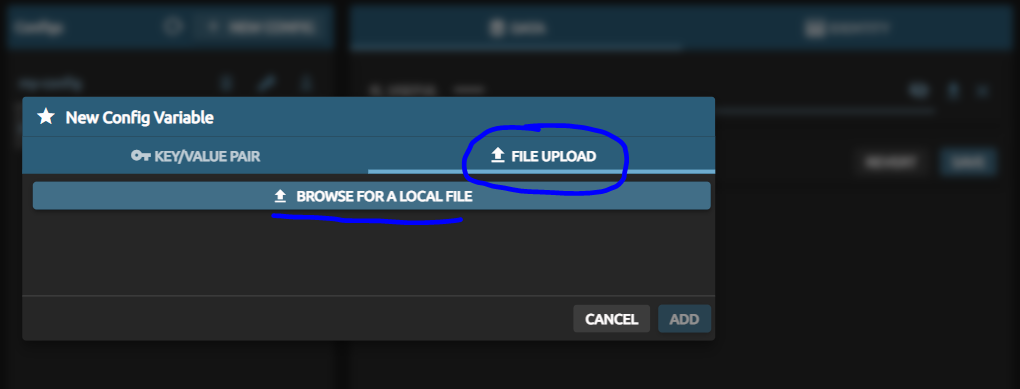
Now, choose tab ‘File Upload’ and select the private key file from your hard drive. This can be named freely, but for this article we stick to the openssh standard name of ‘id_rsa’. And for Windows-experts: yes, it does not have an extension!
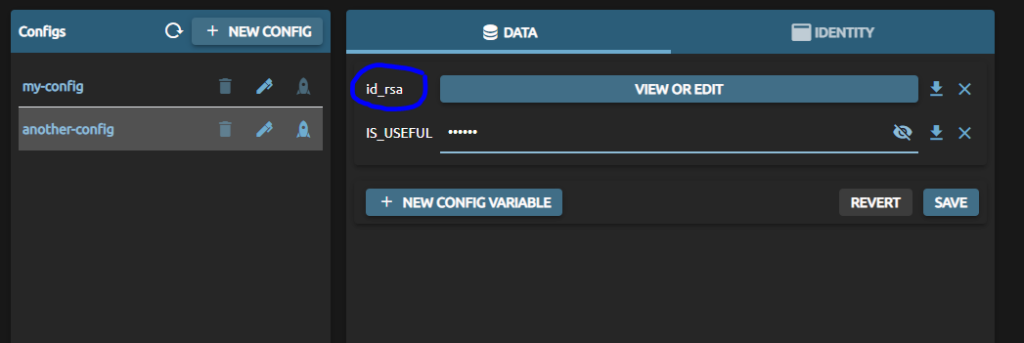
It should look like this afterwards. And please remember to save your changes.
Step: Reference private key in yaml
The pergola.yaml describes the infrastructure needs of an app and its components. Here, you need to register that you will provide a file ( your private key ) and specify its name in the config as well as the location Pergola shall put it to in your container.
It is done in the ‘files’-section of a component. Please specifiy:
a) path: full-qualified path of the file in your docker container ( this is what you what reference in your source code )
b) config-ref: the name of the uploaded file in Pergola UI / Config Management
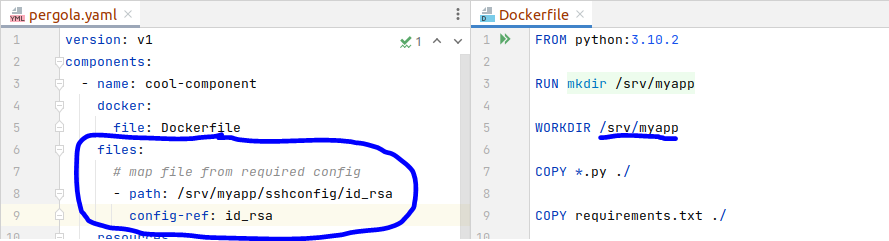
In this example, the private key file is mapped into my containers WORKDIR, subfolder ‘sshconfig’, file name ‘id_rsa’. Of course, I could have named it ‘doge’ or ‘cryptostuff.secret’ as well, but I usually do not rename too much to avoid later confusions.
How to use it in your app
You have provided the file in a config ( at least in one stage ).
And you have defined where you will find the file in your container if you deploy it to that Pergola stage.
The rest is your programming, in the simple case of using an SCP command line client it could look like this:
scp -i /srv/myapp/sshconfig/id_rsa source_file user@10.11.12.13:/tmp/Note how we forward the absolute path of the key, specified in pergola.yaml, to the scp command.
What about a public key
As for a public key – well, it must not be protected and usually you won’t need it in your app. But if so the best practice is to consider it as configuration, too. This enables an admin to switch to a new key pair with the single process of updating configuration files.
Conclusion
Pergola allows you to define any piece of information as a configuration item. This approach is very flexible and should be ( I’d even say ‘must be’ ) used for any kind of secret information. A private key is obviously secret information, so
… just make it configuration! As-simple-as-that.