Ever set up a database cluster by hand? If so, you may be surprised to find out that you don’t need to, as you can just use Pergola to do all the hard work for you. In this blogpost we will use CrateDB, a database using the PostgreSQL wire protocol, so it is basically just like a PostgreSQL database but with the ability to scale horizontally. And the best part is, with Pergola, you don’t even need to care about the cluster configuration at all. Pergola’s auto-scaling will automatically scale the worker nodes up and down based on the load present on your nodes.
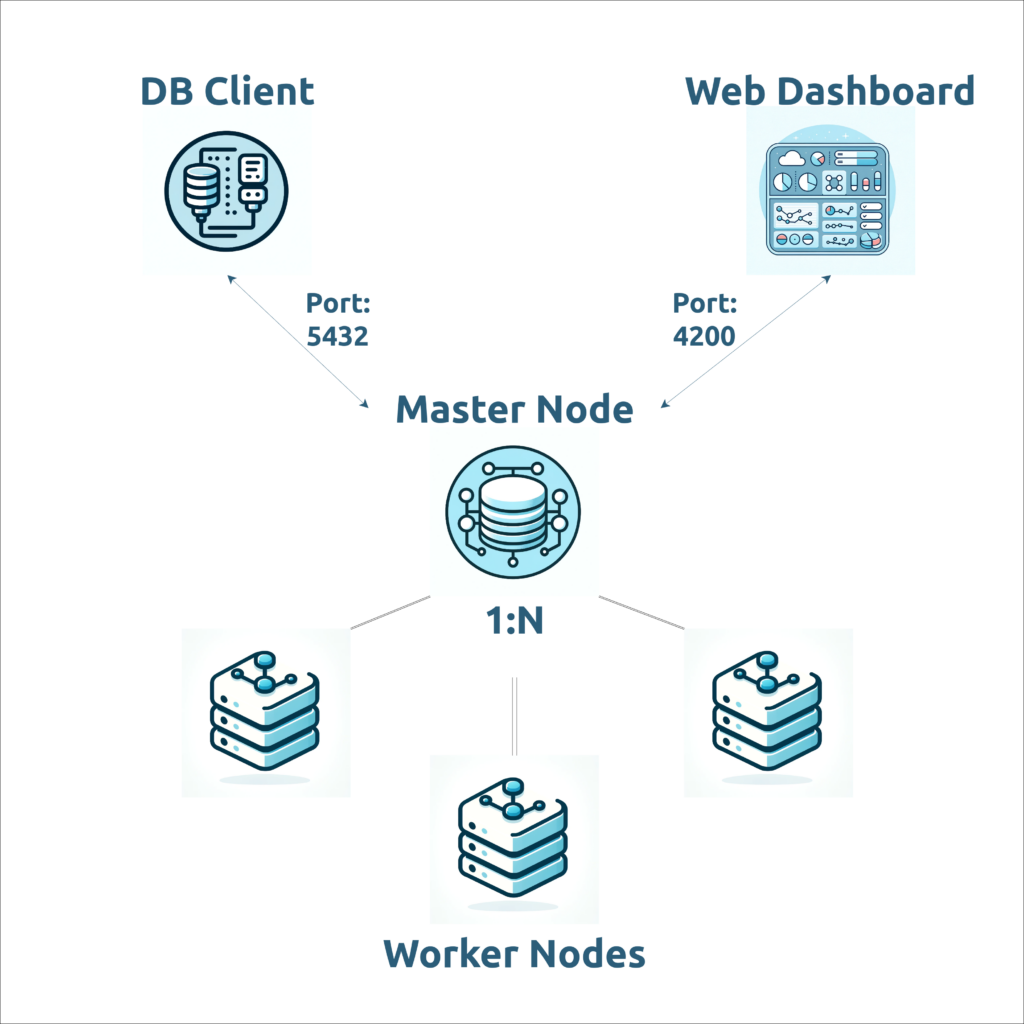
For a better understanding of the structure, here is a visual representation of the components.

Setup
First of all, we need a Pergola project and a git repository to check in the Pergola Manifest. In this case, we can just use the template repository provided by Pergola. If you want to modify the cluster, you can simply clone the repository and push it to your own repository or even just copy the manifest.
pergola create project cratedb-cluster --git-url git@github.com:datasophie/cratedb-cluster.gitConfigure the Pergola Manifest
We can configure the whole database cluster entirely in the Pergola Manifest, and we need to create only two components.
The first component will be the master node, which initializes the cluster and manages the nodes. Our second component will be the worker node, where we reference the master node via component-ref and use a scaling, which turns it into a cluster.
Here is the already prepared pergola.yaml:
---
version: v1
components:
  # create the master database node
  - name: crate-master
    docker:
      image: crate # use the official crate image
    ports:
      - 4200 # dashboard port
      - 5432 # database port
    env:
      # aggregate the hostname by component reference
      - name: CRATE_HOST
        component-ref: crate-master
      # set the heap size
      - name: CRATE_HEAP_SIZE
        config-ref: crate_heap_size
        value: 2g
    ingresses:
      # expose the dashboard
      - host: dashboard
        path: "/"
        port: 4200
    resources:
      cpu: 1000m
      memory: 3Gi
    storage:
      # create a persistent volume for the database
      - name: data
        path: "/data/"
        size: 20Gi
    files:
      # mount the configuration file
      - path: "/crate/config/crate.yml"
        config-ref: crate.yml
    args:
      # pass the crate command line arguments to configure the master node
      - crate
      - "-Ccluster.name=crate-cluster" # set the cluster name
      - "-Ccluster.initial_master_nodes=$CRATE_HOST" # set the initial master node
      - "-Cnode.name=$CRATE_HOST" # set the node name
      - "-Cnode.data=true" # enable data storage
      - "-Cdiscovery.seed_hosts=$CRATE_HOST" # set the seed host
      - "-Cnetwork.host=_site_"

  # create the worker nodes
  - name: crate-worker
    docker:
      image: crate
    ports:
      - 5432
    env:
      - name: CRATE_HOST
        component-ref: crate-worker
      # aggregate the seed hostname by component reference
      - name: CRATE_SEED_HOST
        component-ref: crate-master
      - name: CRATE_HEAP_SIZE
        config-ref: crate_heap_size
        value: 2g
    resources:
      cpu: 1000m
      memory: 3Gi
    scaling:
      # apply a scaling to the worker nodes
      min: 3
      max: 5
    storage:
      - name: data
        path: "/data/"
        size: 20Gi
    files:
      - path: "/crate/config/crate.yml"
        config-ref: crate.yml
    args:
      - crate
      - "-Ccluster.name=crate-cluster"
      - "-Ccluster.initial_master_nodes=$CRATE_SEED_HOST" # set the expected initial master node
      - "-Cnode.data=true" # enable data storage
      - "-Cdiscovery.seed_hosts=$CRATE_SEED_HOST" # set the seed host
      - "-Cnetwork.host=_site_"
Commit the manifest & push the build
# commit and push your changes, if there are any
# git add . && git commit && git push

# then:
pergola push build -p cratedb-cluster
Create a stage
pergola create stage dev -p cratedb-cluster --type dev Add the configuration file to Pergola
CrateDB needs a configuration file to configure the cluster called crate.yml. The configuration in the template repository is well suited for this blogpost, but keep in mind for a production environment you need to define better access controls.
pergola add config-data default -p cratedb-cluster -s dev --file crate.ymlPush the release
pergola push release -p cratedb-cluster -s dev -b main_b1 -c defaultCheck the status
pergola list component -p cratedb-cluster -s devIf your cluster is ready, you should see your available dashboard ingress and all your active database nodes.

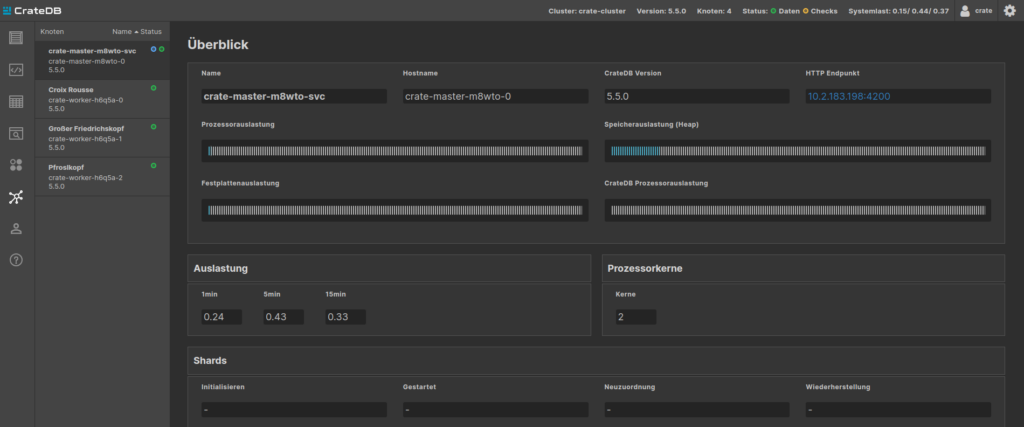
So the database cluster should be up and running, and now you can check the URL of the ingress and monitor your cluster or just connect to the database via a PostgreSQL driver.

Conclusion
So as you can see, setting up a fully fledged, scalable, database cluster in the cloud can be done in under 5 minutes, just by using Pergola, without a headache or any other overhead. It’s really that simple.
